
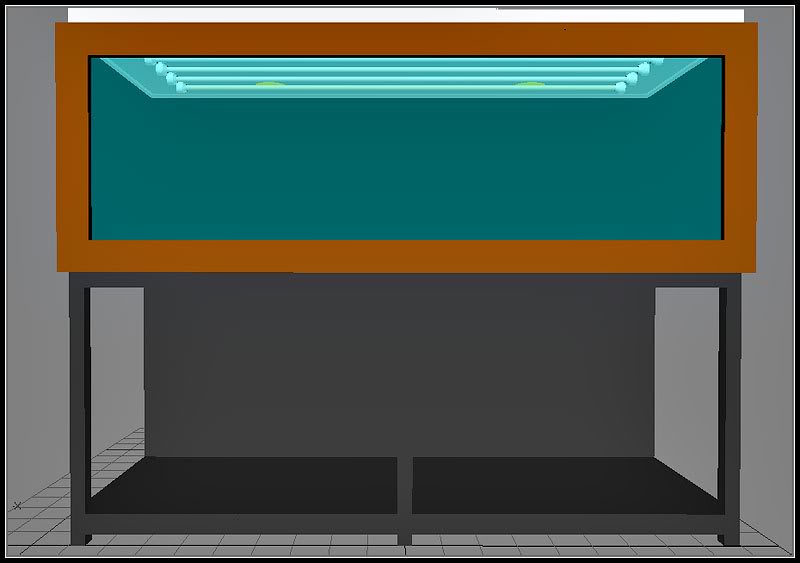
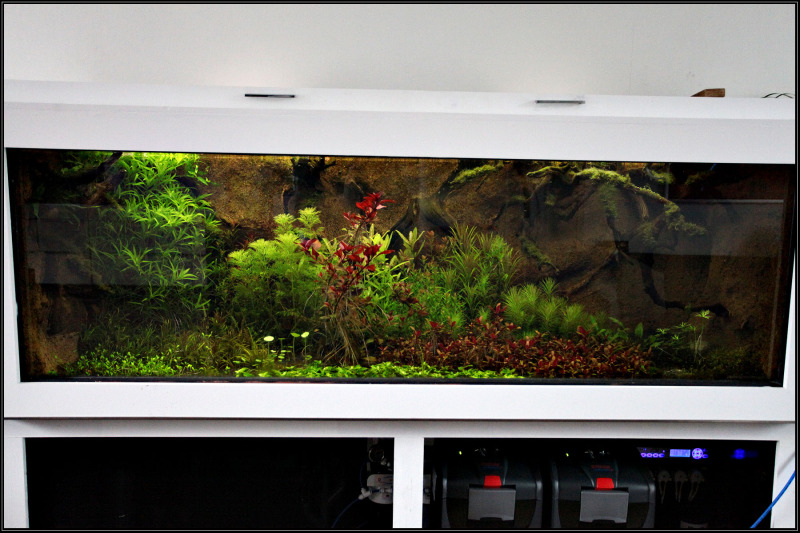
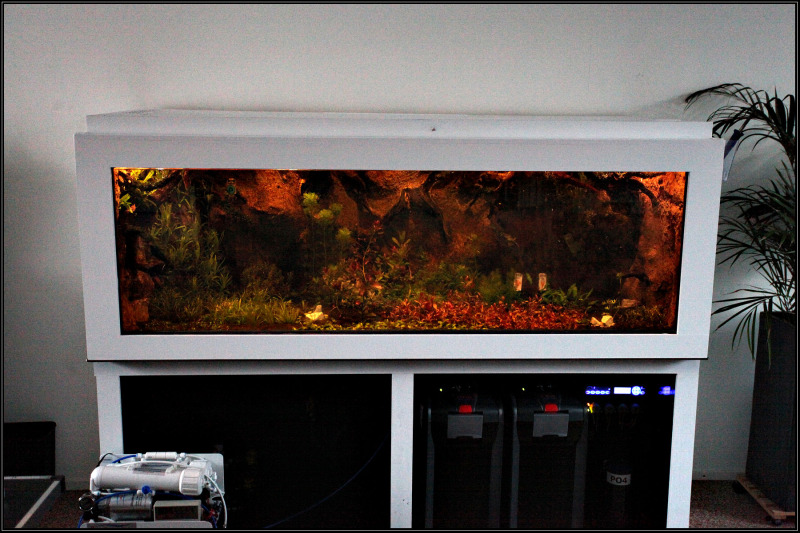
So i have been a bit quiet over here, due to the fact that i was very busy at work and i have worked on my secret project. I've managed to finish my new tank a little over 7 months ago.
Specs are:
- 180x70x70 plywood tank with glass front
- No stabilizers (e.g. i have full movement over the tank)
- Pump connections all through the bottom of the tank
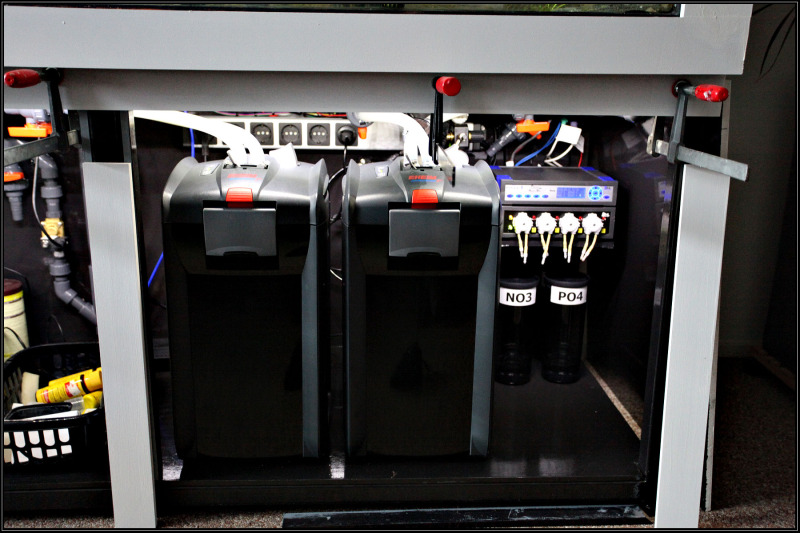
- 2x Eheim 2078 filtration
- Up Aqua Atomizer for CO2
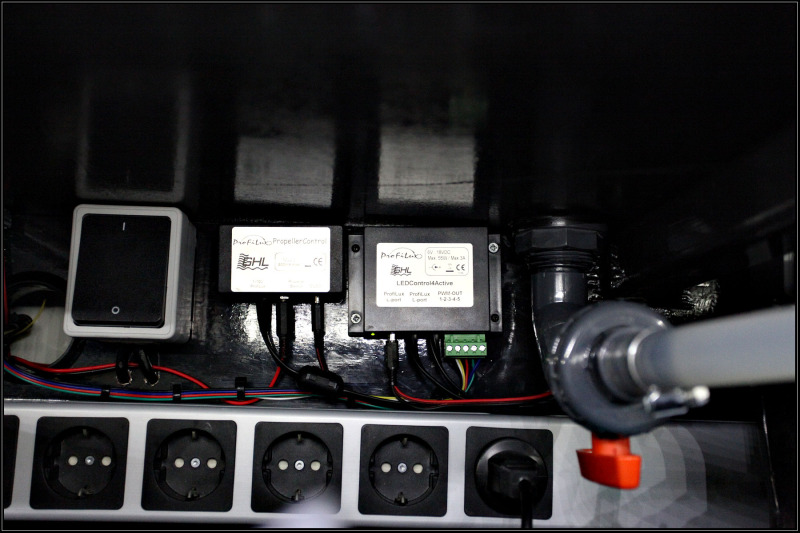
- Profilux 3 controlled
- Profilux 3 dosing computer
- 5x 80w maxium light, dimmable by the Profilux 3 (DALI protocol)
- LEDs for the Profilux 3 (thunderstorms)
- Auto top off
- Auto water change with RO water (5% every night)
Here are the pics of the build.
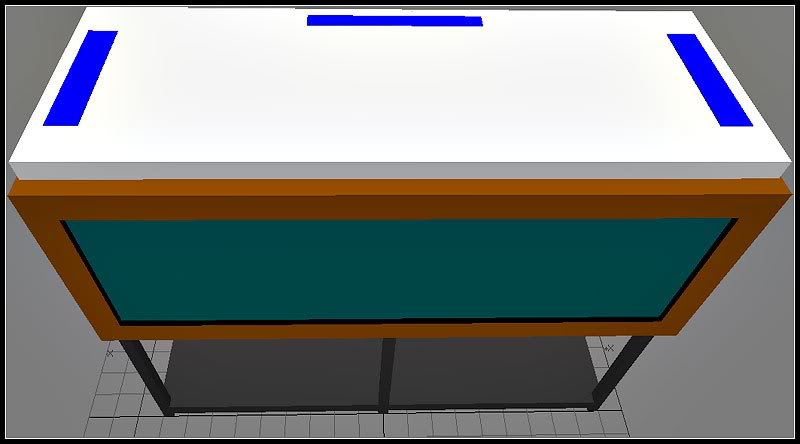
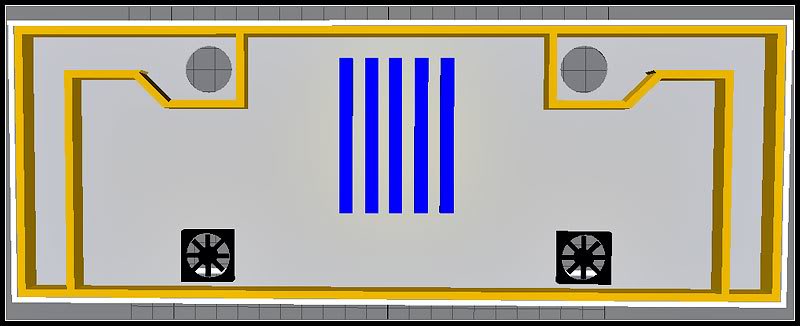
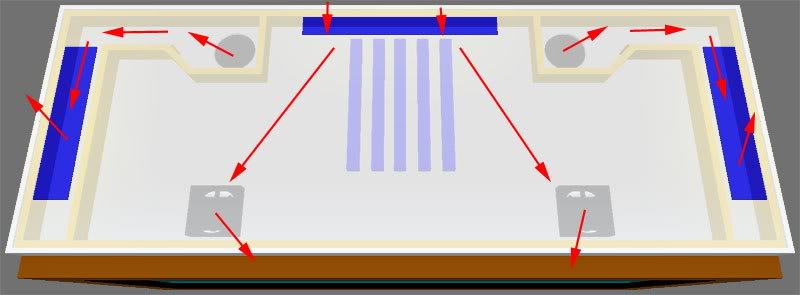
Design:
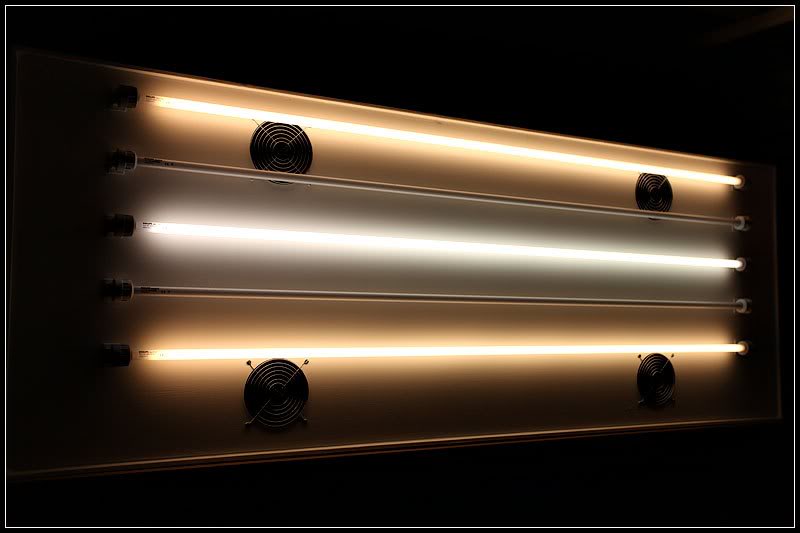
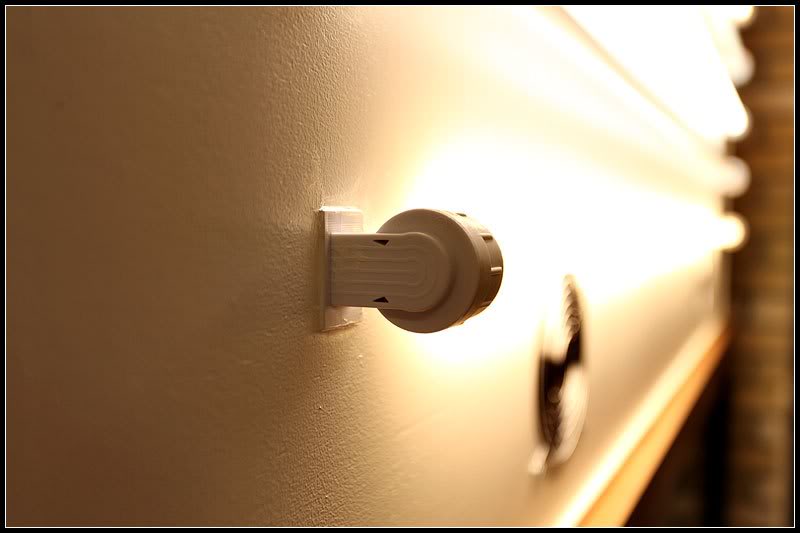
The blue parts on the canopy are ventilation shafts. As you can see inside the canopy i have placed my ballasts and made such a channeling that the outside/room air flows from the center back over the ballasts inside my hood (warm air) and at the sides the moist air is going out.
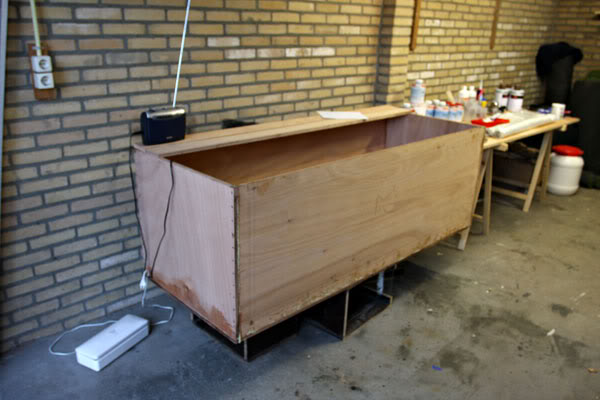
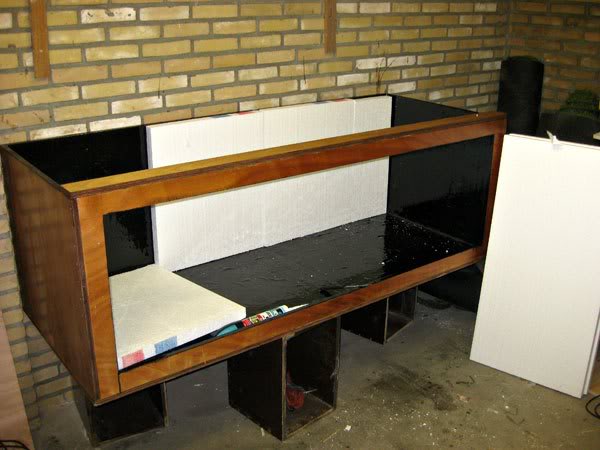
Construction:
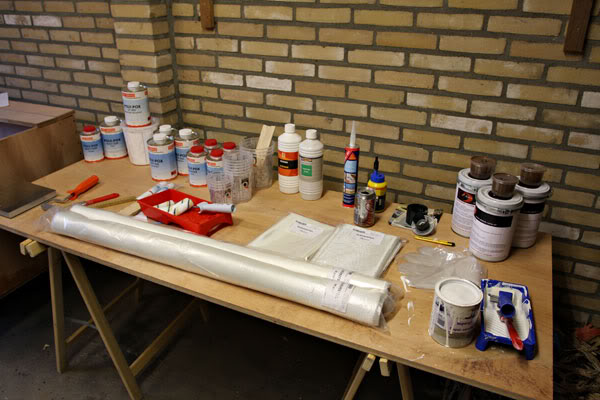
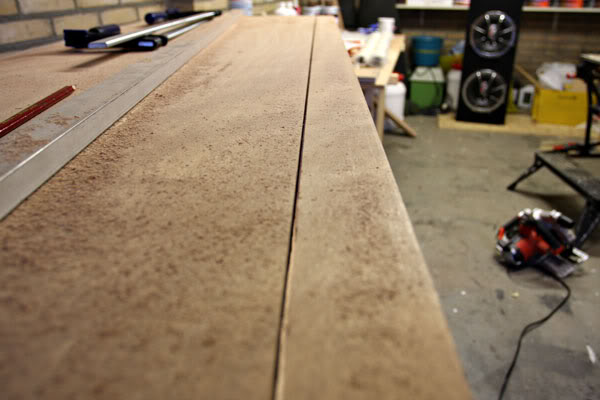
I was constructing this tank for over 2 years. It was a hobby project so a lot of time and money went into it. It all starts with supplies")
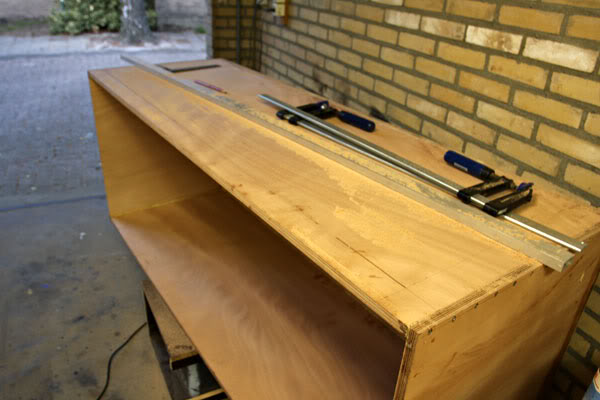
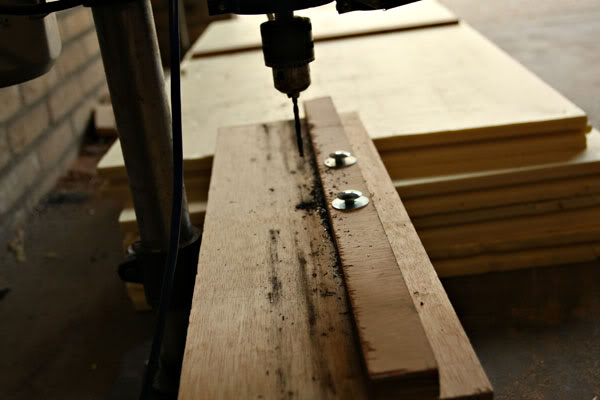
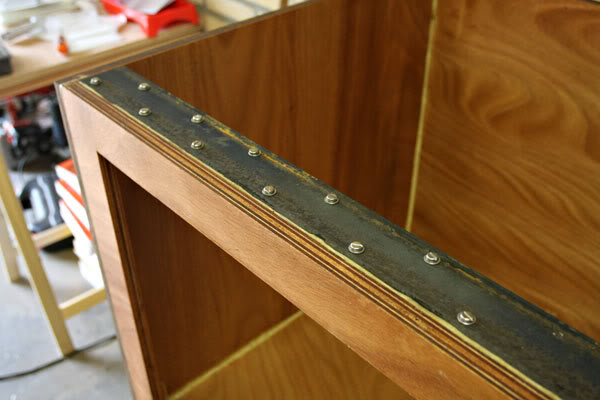
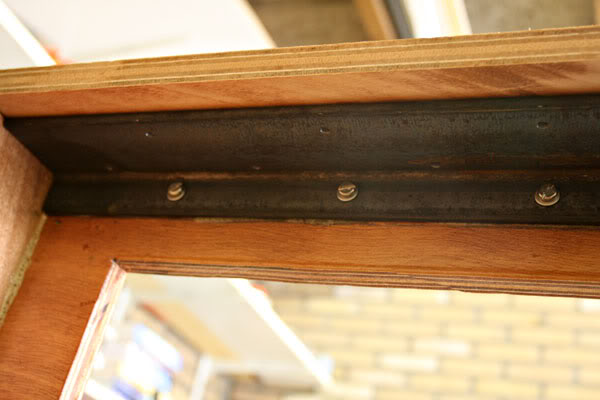
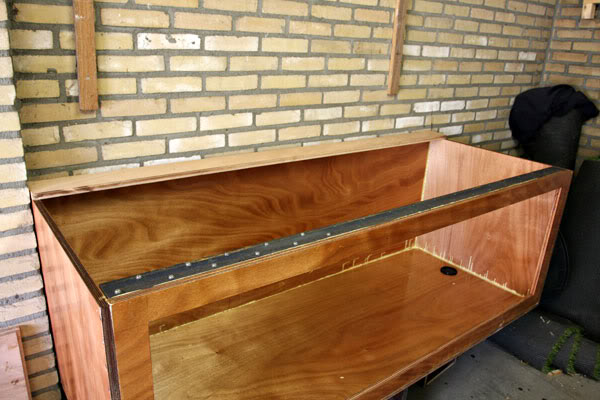
Reinforcements:
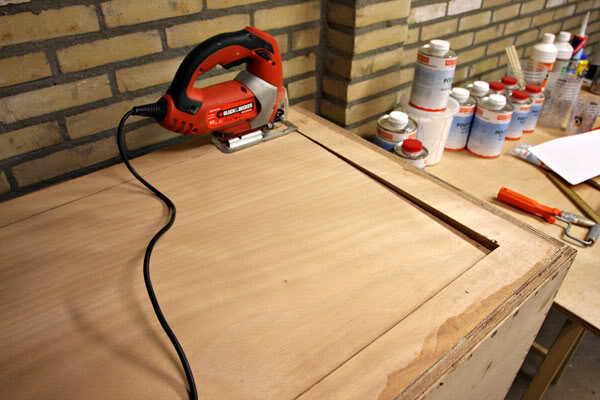
First, i painted the plywood with an epoxy resin to make it water proof. Next i wanted absolutely NO stabilizers in the tank. Therefore i had to reinforce the front since the top bar has to little 'wood' to support the front window. So i ordered a steel beam and got crazy with the drill.
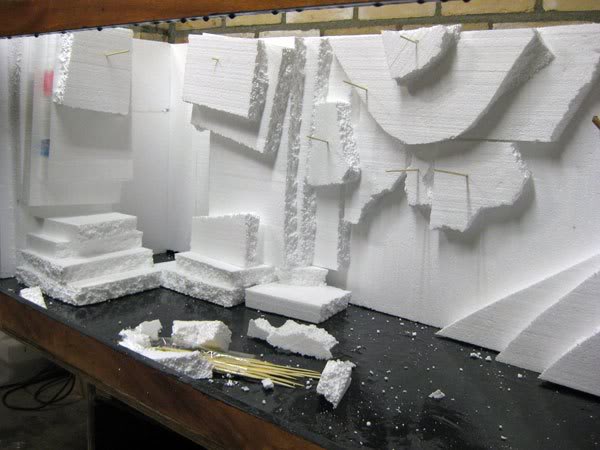
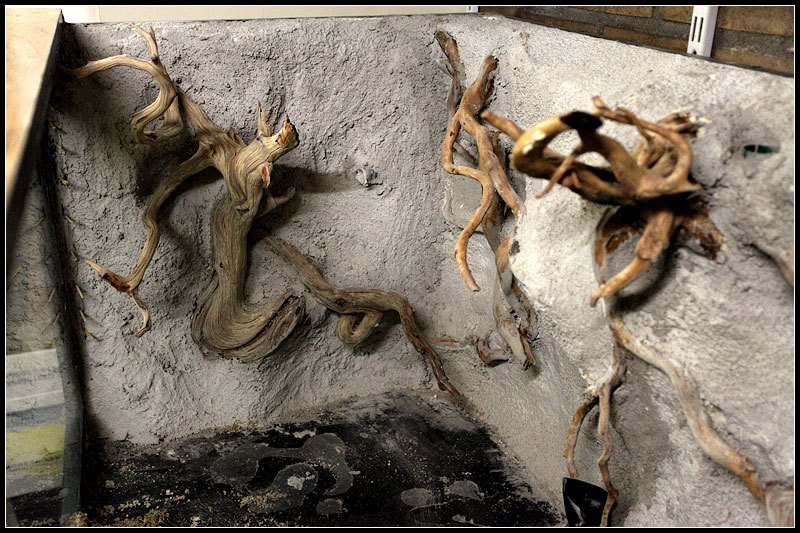
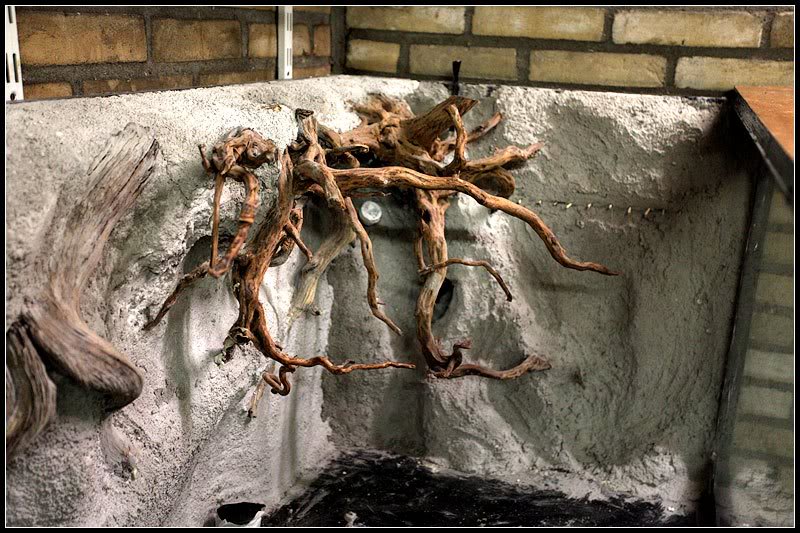
Background, attempt 1:
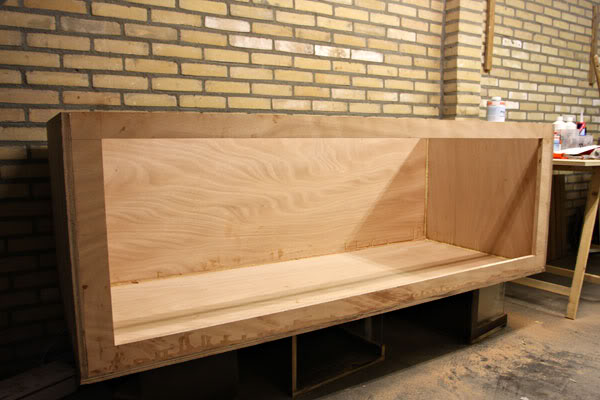
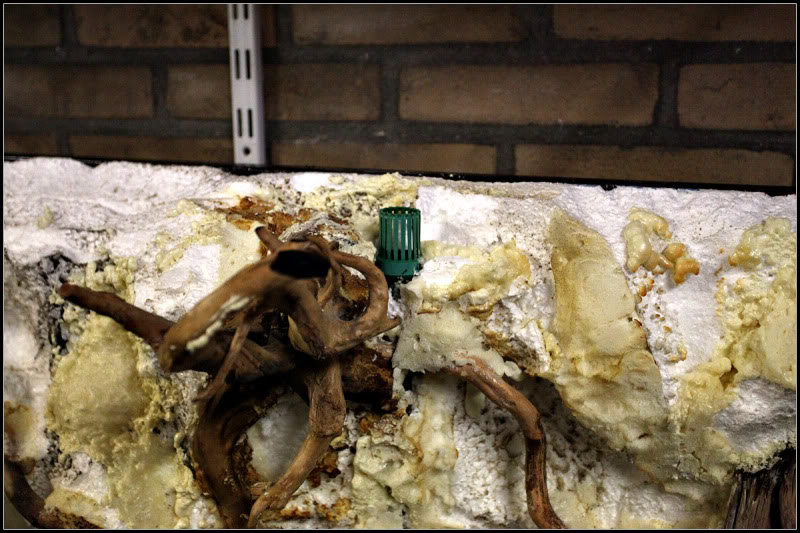
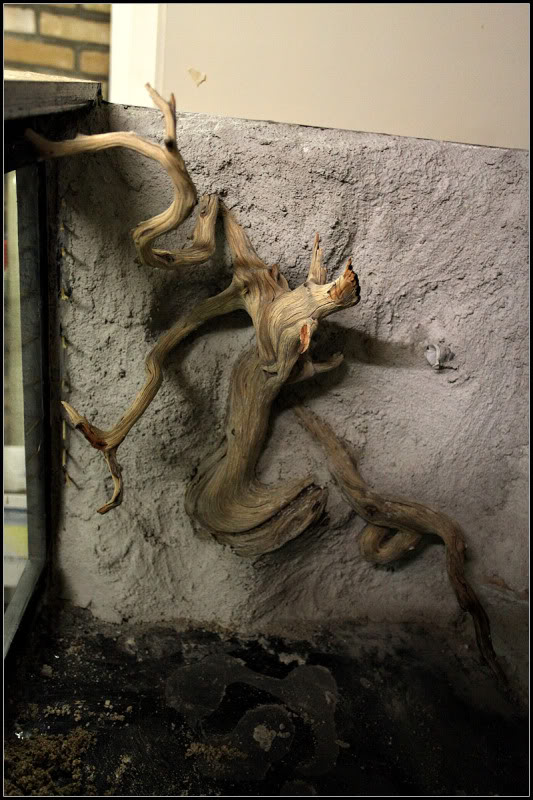
Next up was the background. First i applied several layers of fiber glass matt to enforce the casing. In total there are about 3 layers of fiberglass. I wanted to incorporate wood into my background, although i am aware of the risks (rotting and the fact that it becomes a part of the layout)
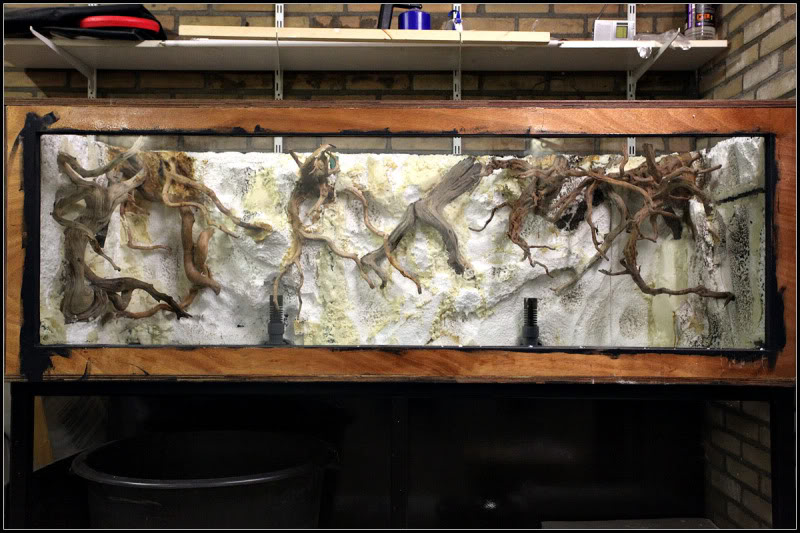
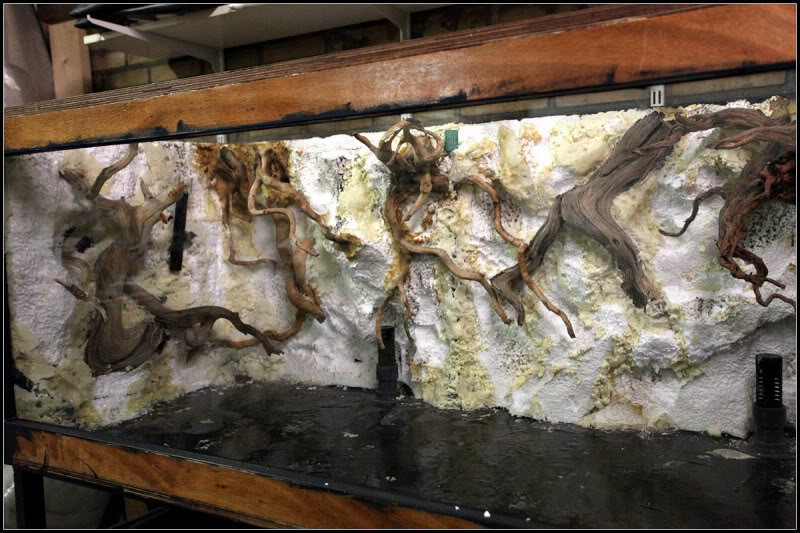
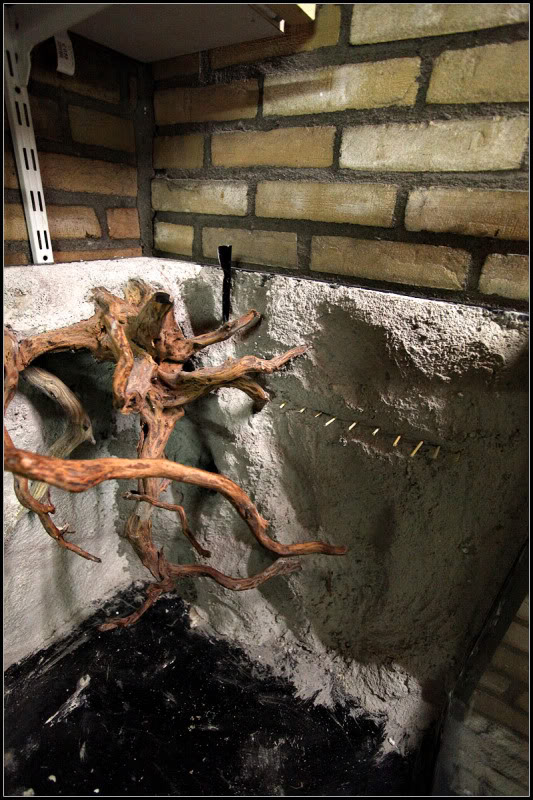
Background, attempt 2:
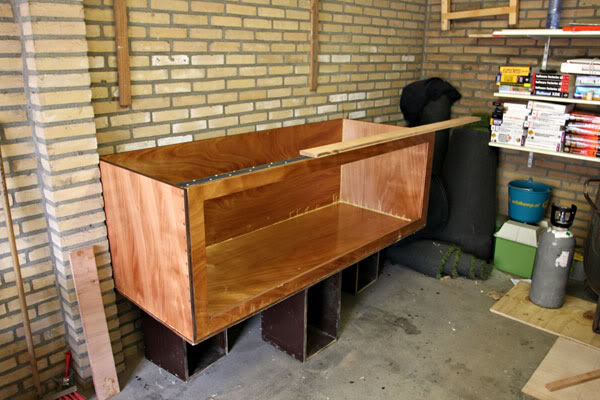
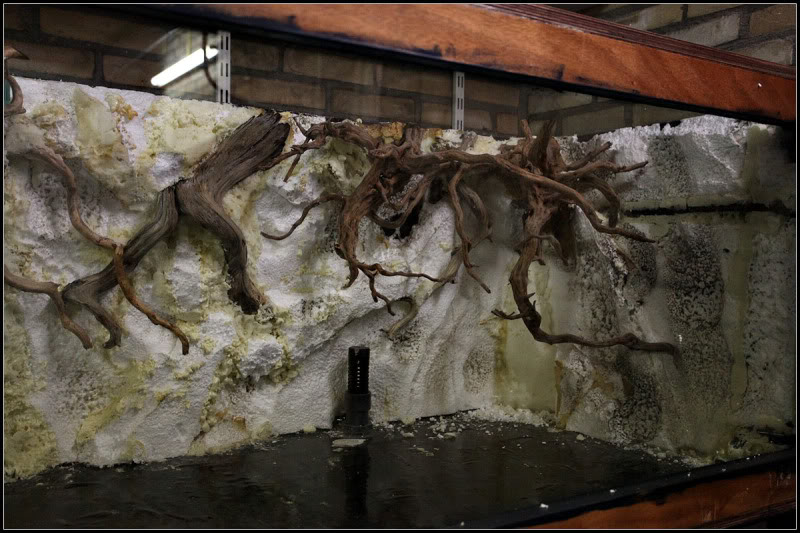
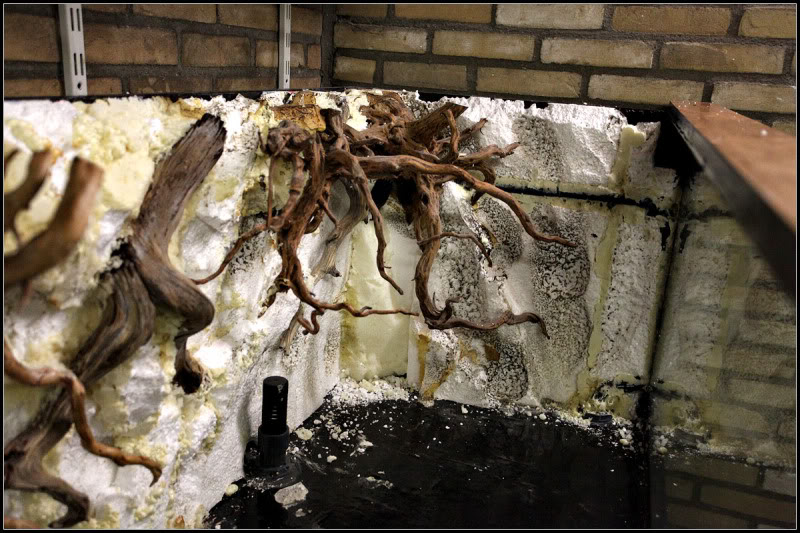
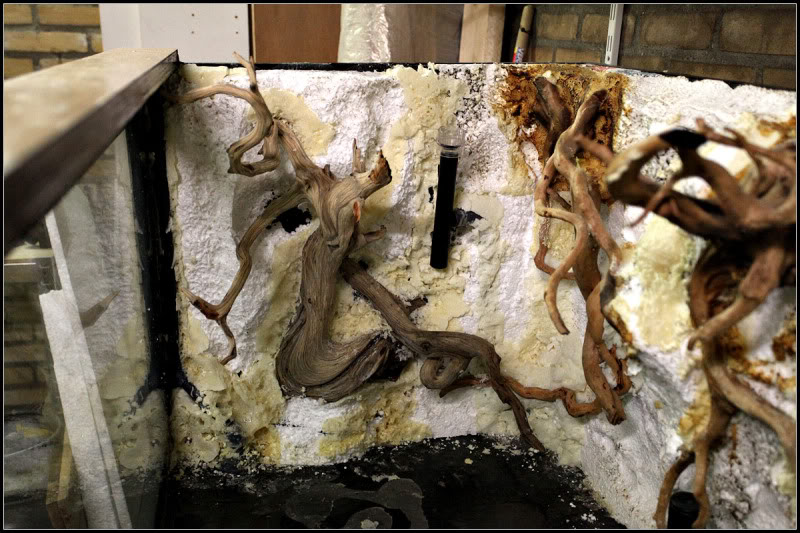
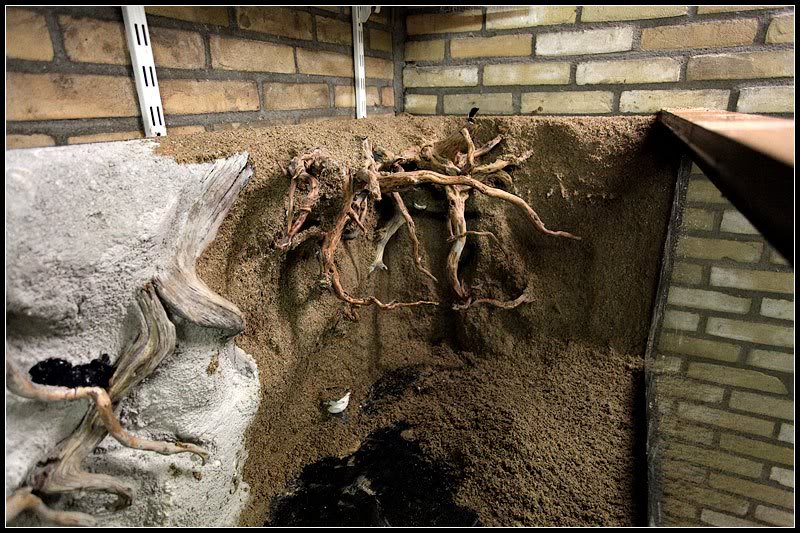
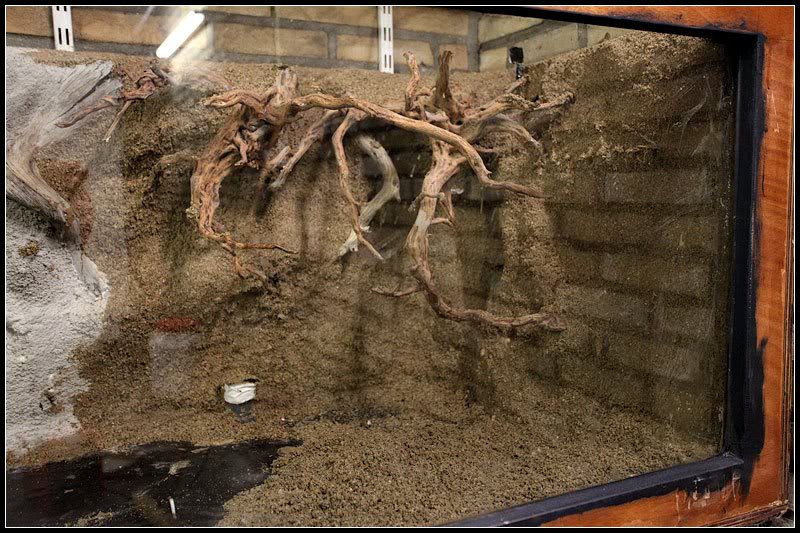
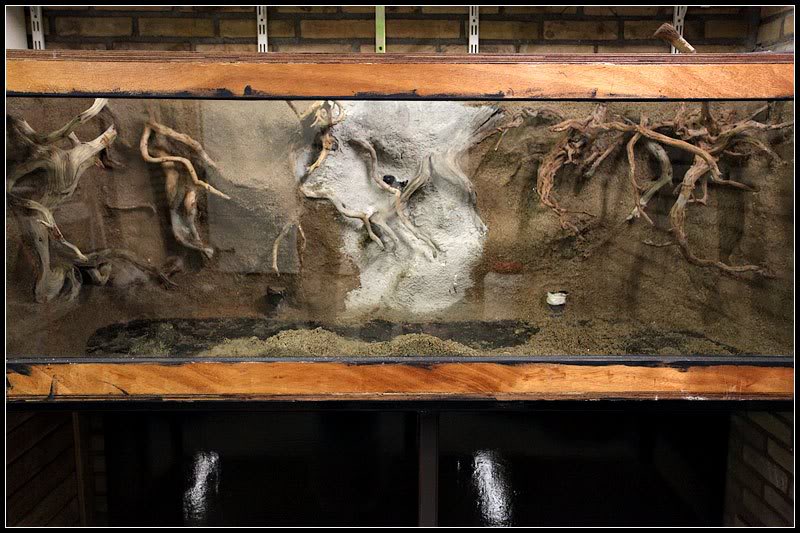
I was not happy with the above background. The friend which helped me had some good insights, but i wanted to have a planted tank. To much background equals less space for plants. So i decided to redo it. This is the result. If you look closely, you can see the return pipes (in both sides at the front of the glass) and my emergency overflow, the green cascet). Pump intakes are behind in the tank.
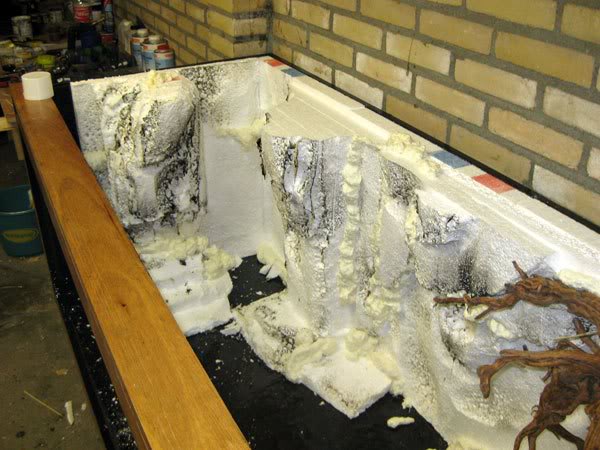
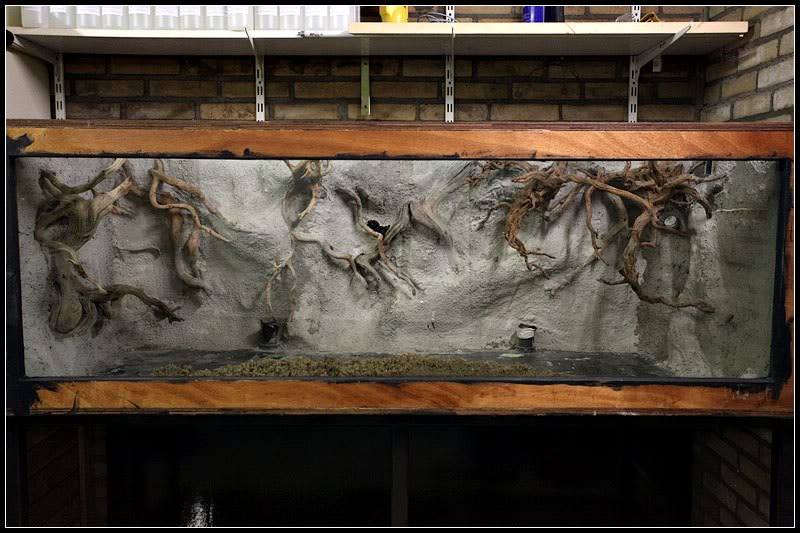
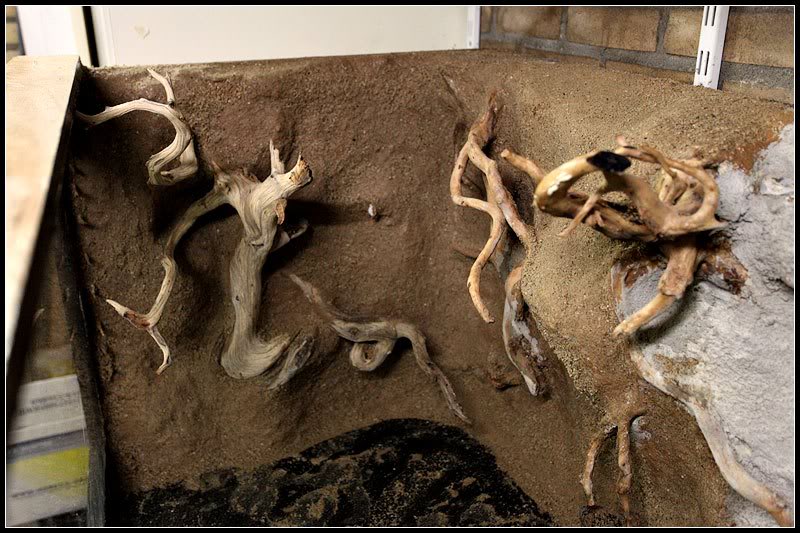
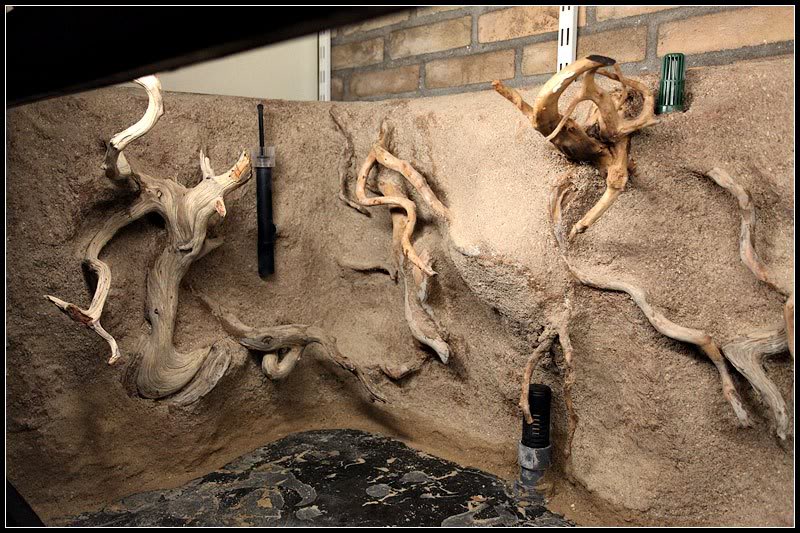
Background, finalizing:
Next up is to finish the background. First step involves adding concrete to the background. Why concrete? Since this makes it possible to smooth out holes and make a more rock-like structure. After the (Portland) cement i started adding "Elastopur" basically this is rubber like, 2-component glue-ish stuff which hardens in about 45 minutes, so you have to work fast. The color is yellow-ish but you can add pigment to make it more your own taste. I added brown and immediately after putting on the elastopur i added sand to make it even more naturally. It then looks like this....
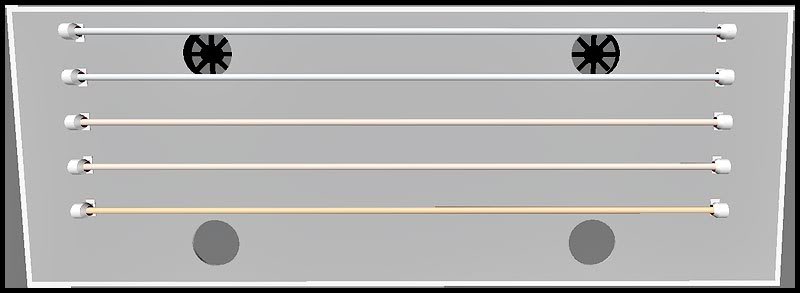
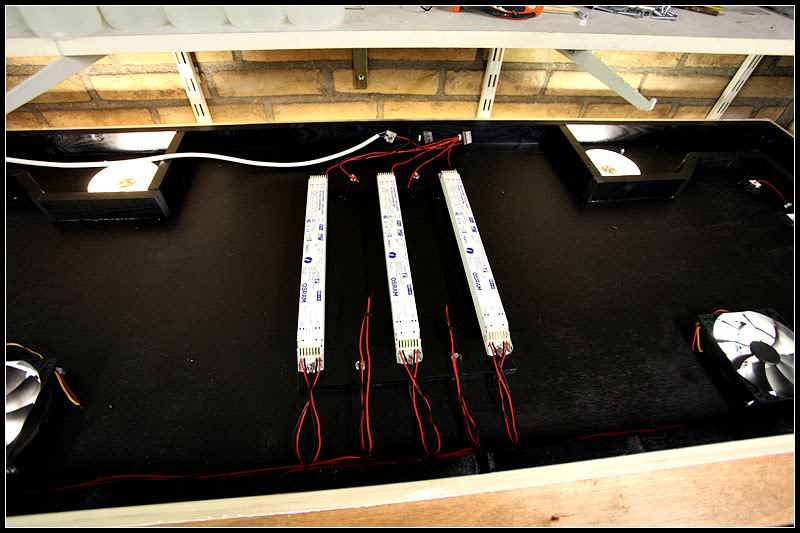
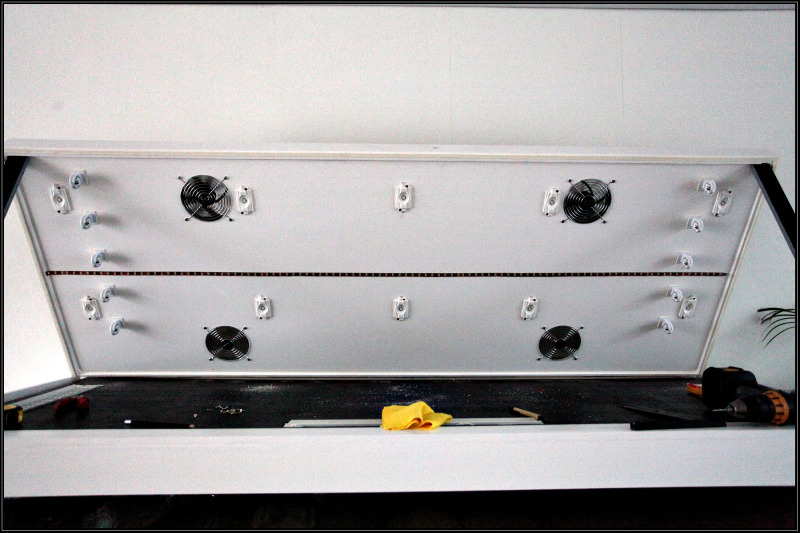
Next up, canopy:
So i've used some lamp holders from ebay and arraged my lights according to the design which is at the top of this post. Not a lot of pictures, but here goes.
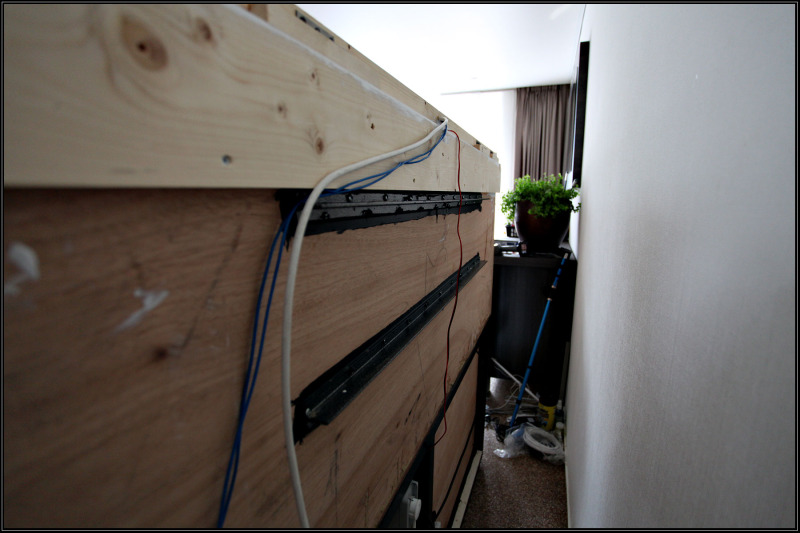
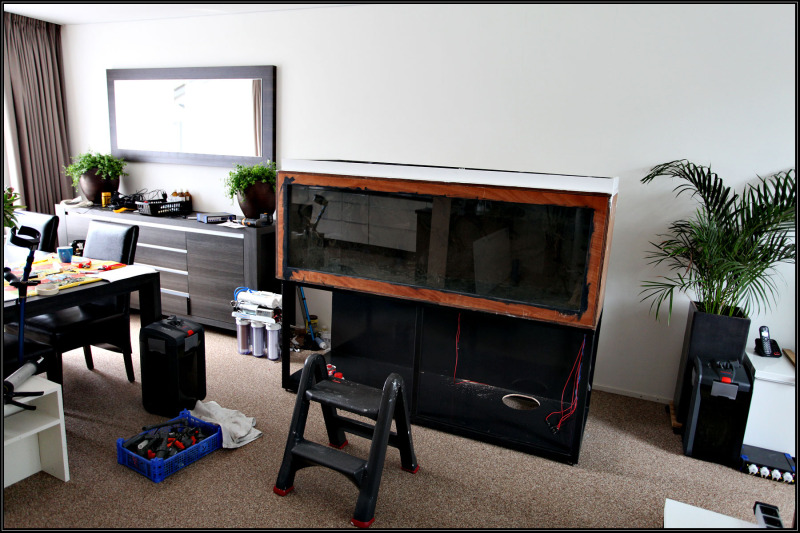
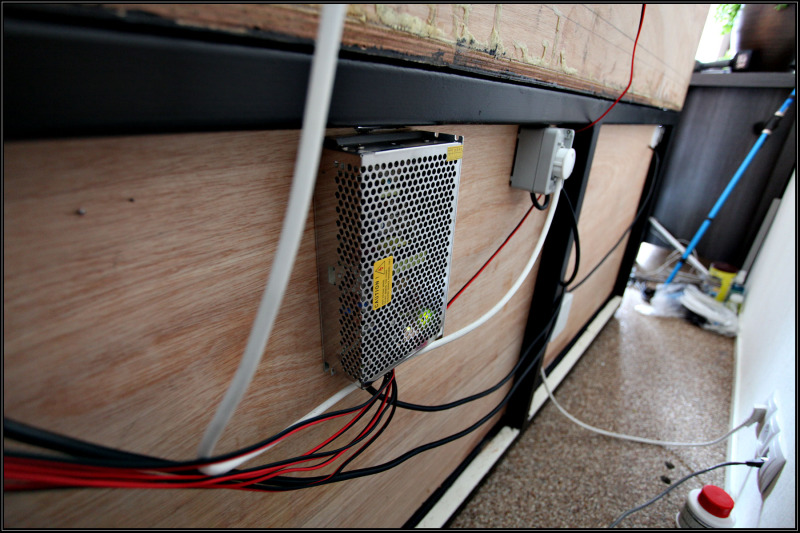
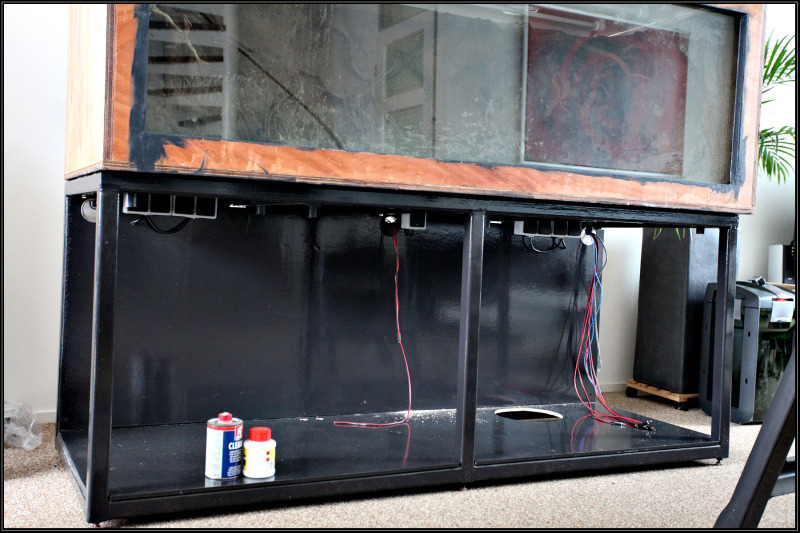
Moving the tank:
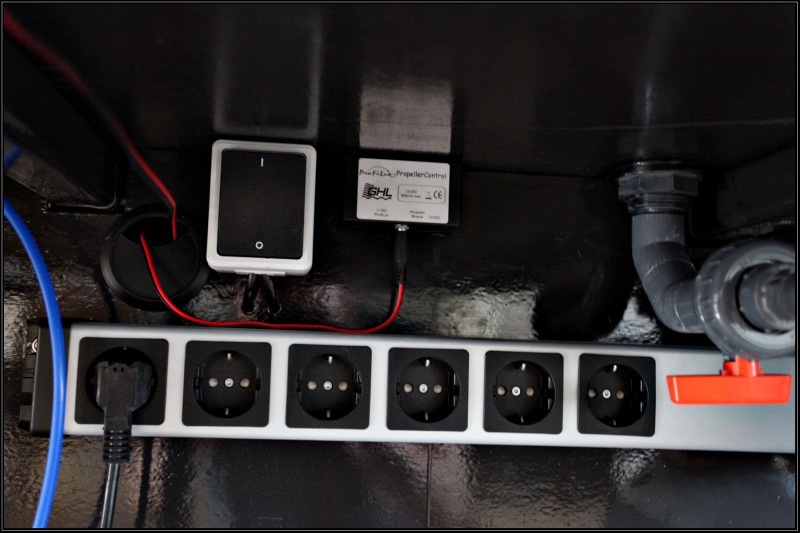
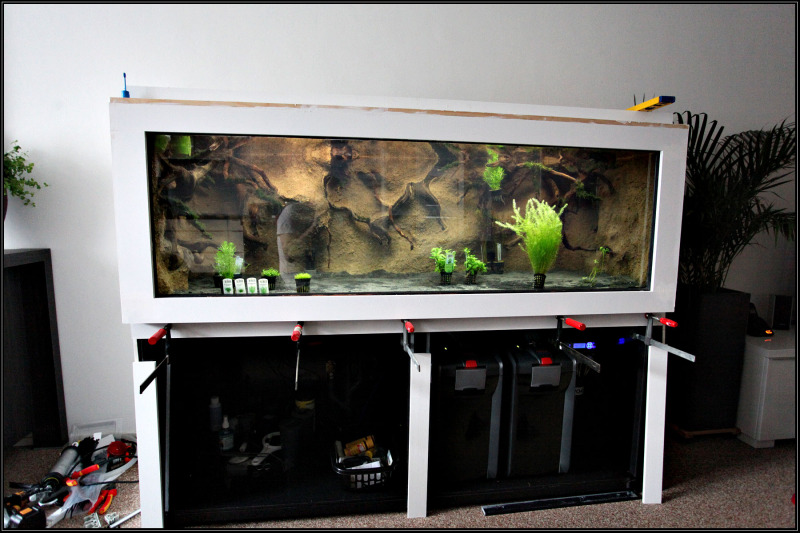
After one month of test running in the garage where i built the tank (my wife is not that happy with 750 liters of water in the living room), i decided to move the tank indoors. I already had the holes for AWC so that helped a lot. In the pictures you also see my trafo, giving 12v. It is behind my tank so that means i can't access it anymore but as long as it works i am happy. It powers my Profilux and connected appliances so i don't have to use that much power adapters. The first picture shows the reinforcements i made at the back of the tank to make sure it doesn't bend.
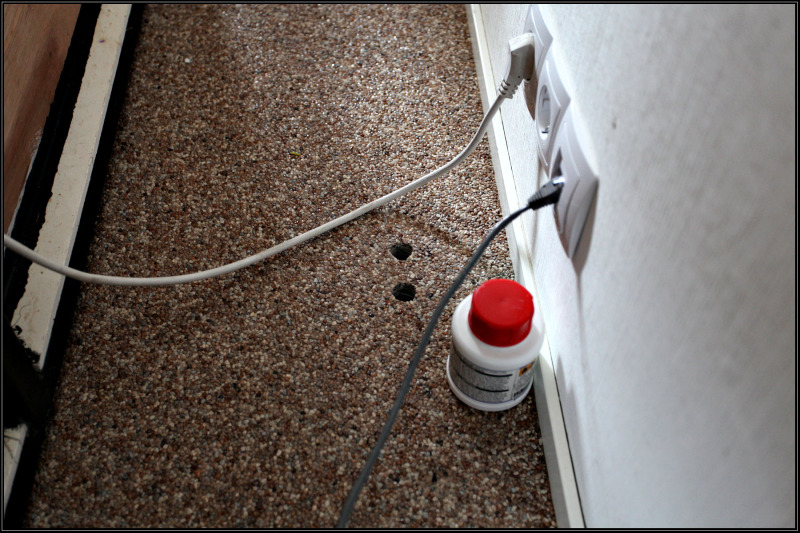
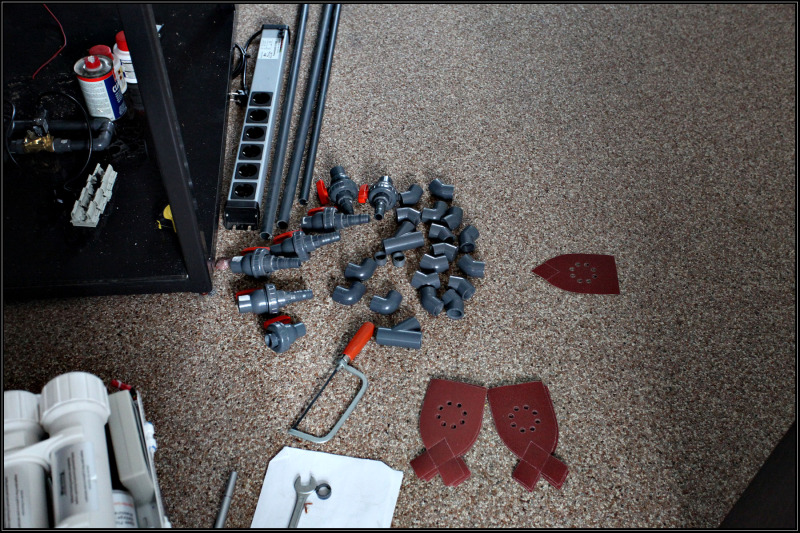
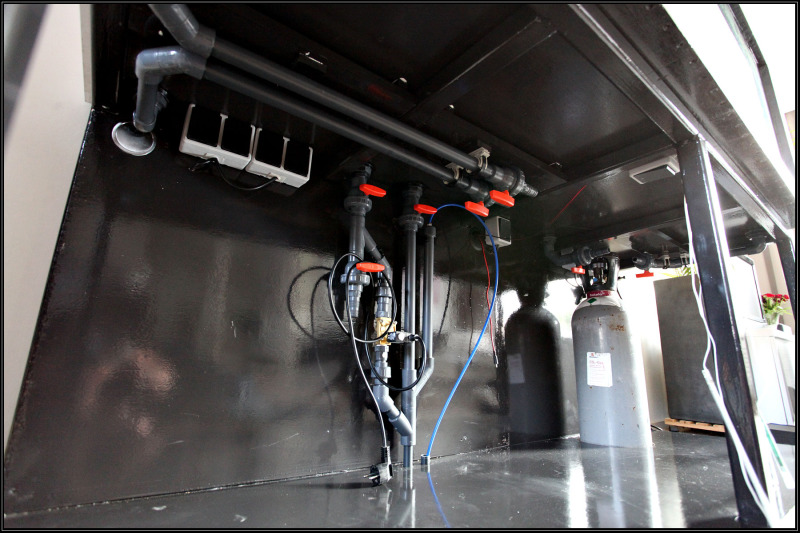
Plumbing the AWC:
Not much plumbing to do, i had everything pretty much figured out and since i had to fill the tank with water anyway, most of the parts where already in place. However, i still had to do my AWC system which is illustrated in the next pictures.
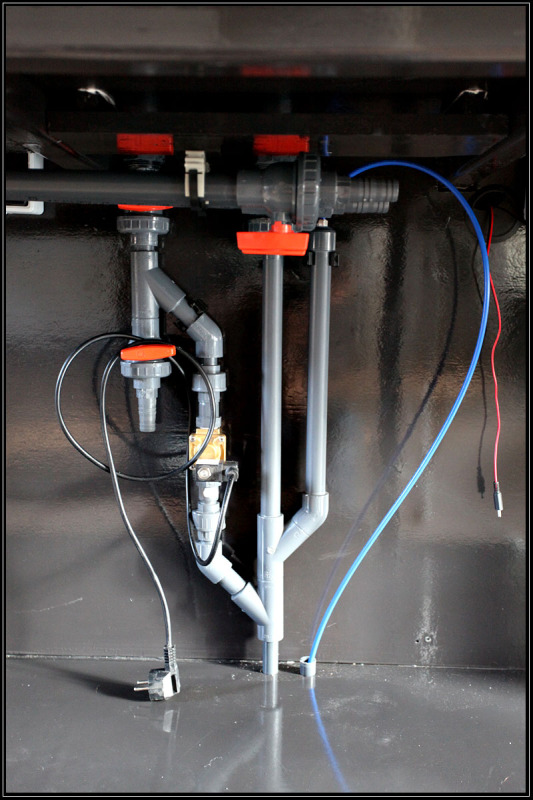
The 'beast' consists of the following parts:
- The left pipe is the pipe which is directly connected to the tank. This means i can use the valve to quickly drain my tank or to get some water to water my plants
- The second pipe from the left is attached to a water solenoid. Currently i am using a different solenoid since the one in the picture required back pressure before it opened. Picture is to follow.
- Third pipe from the left (the long straight one) is directly connected to my emergency overflow and goes to my sewer. Basically the drain pipe.
- Forth pipe from the left (e.g. the right one) is connected to the blue waste water line of my R/O unit.
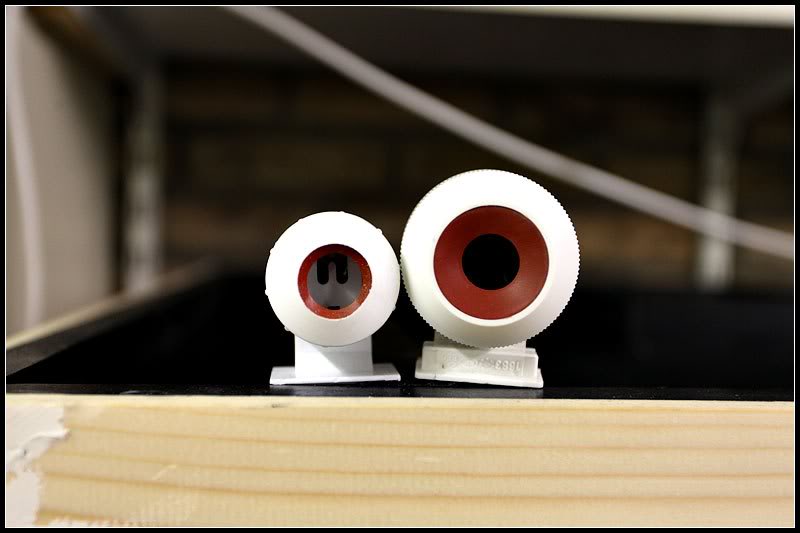
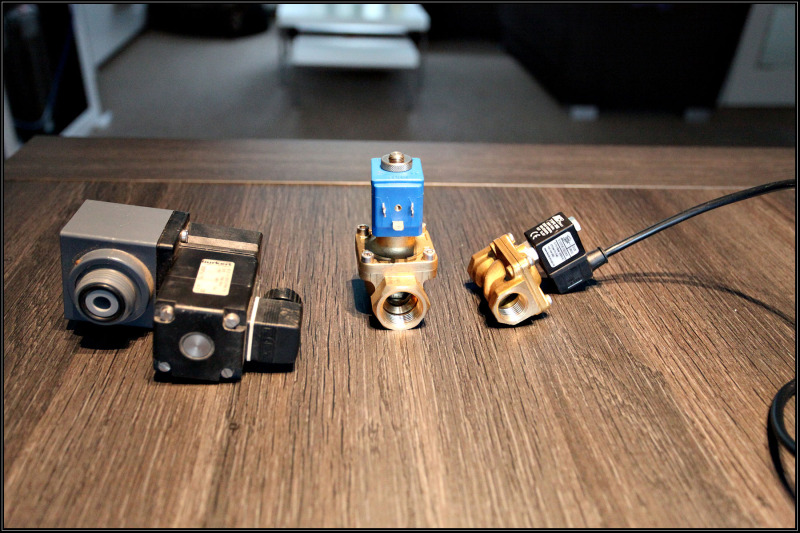
The last picture shows the different solenoids i have used. The left one is now in place and works like a charm, draining 5% (40 liters) in about 2 minutes. I could have increased this, but that meant i had to use a bigger pipe (20mm) instead of 16mm which is now in place.
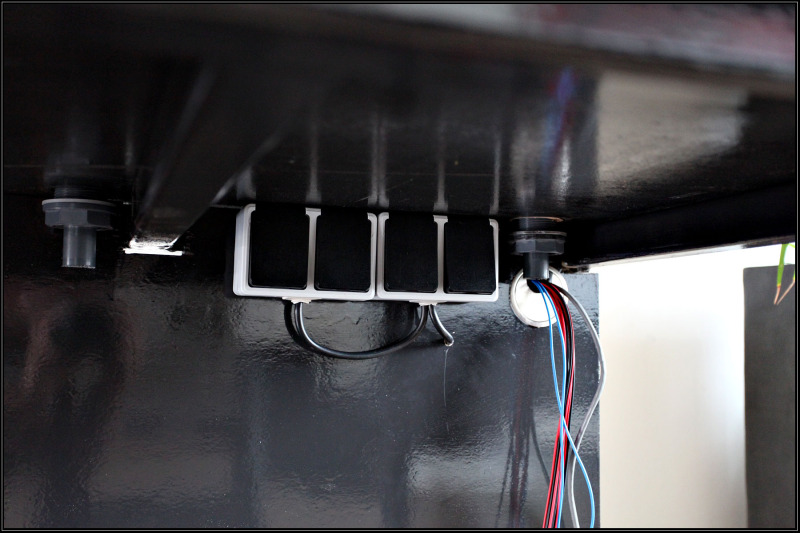
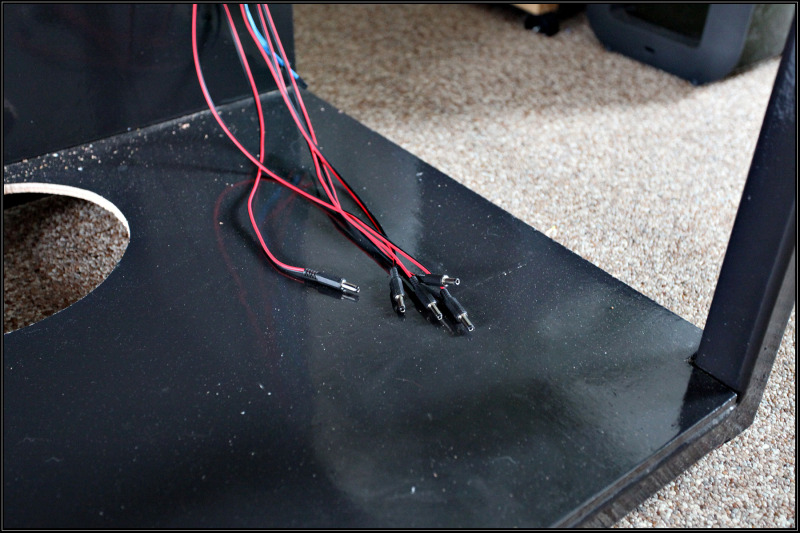
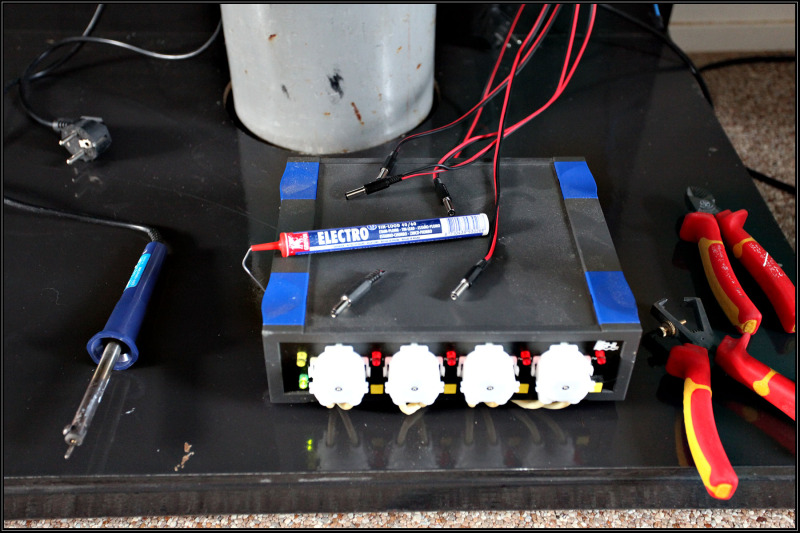
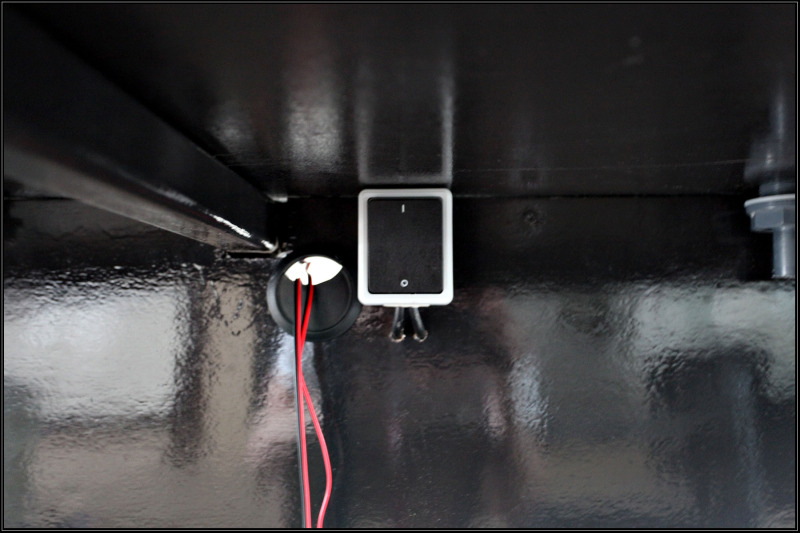
Finalizing the build:
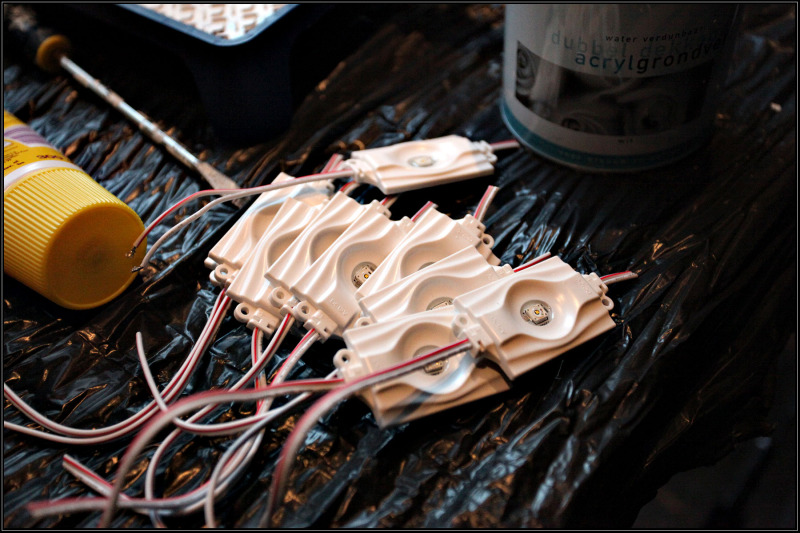
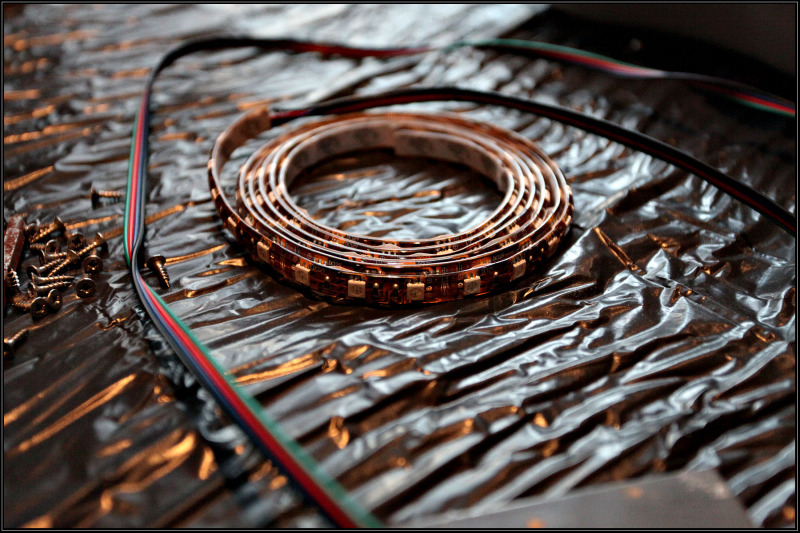
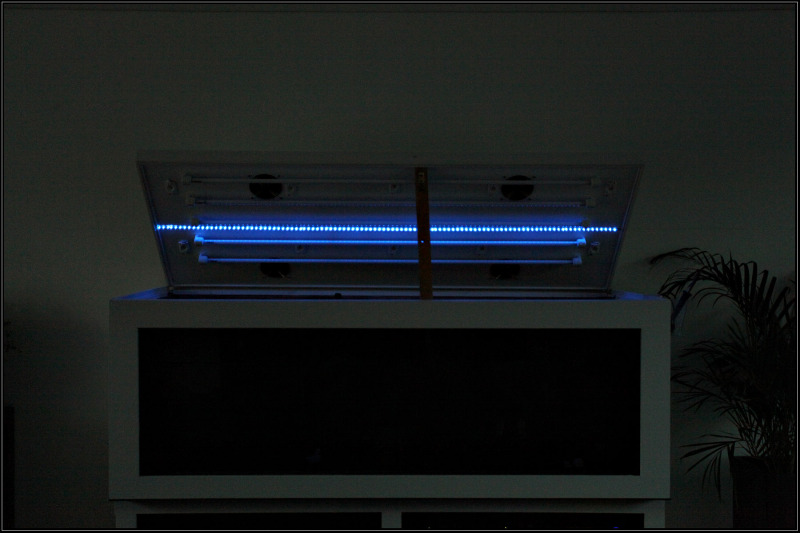
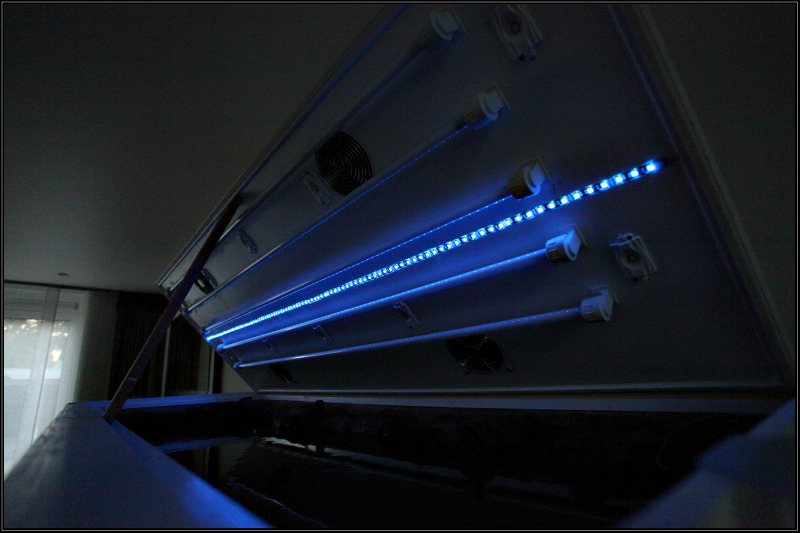
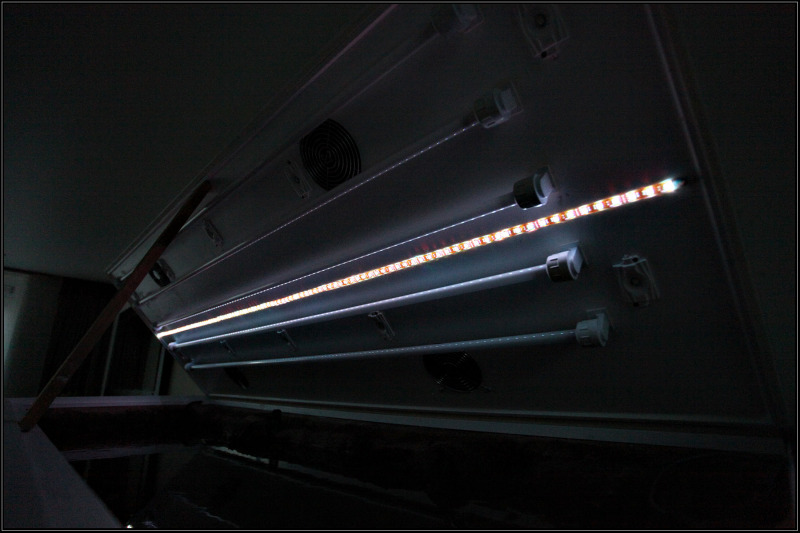
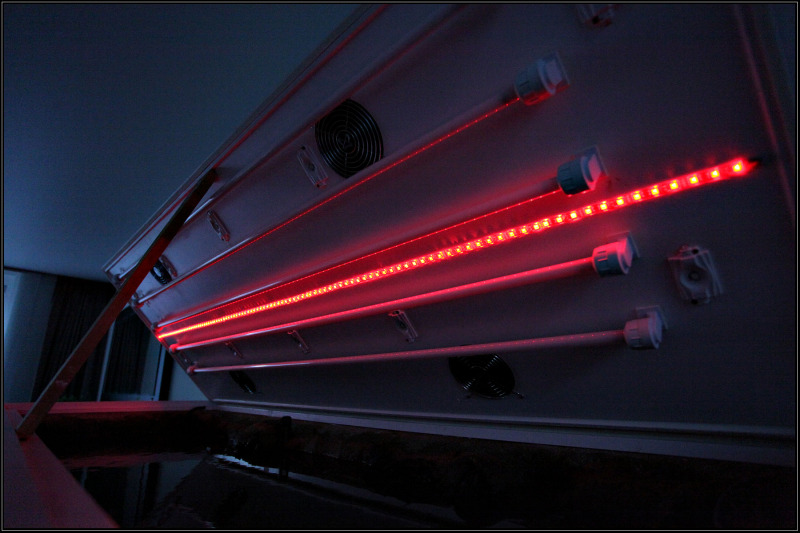
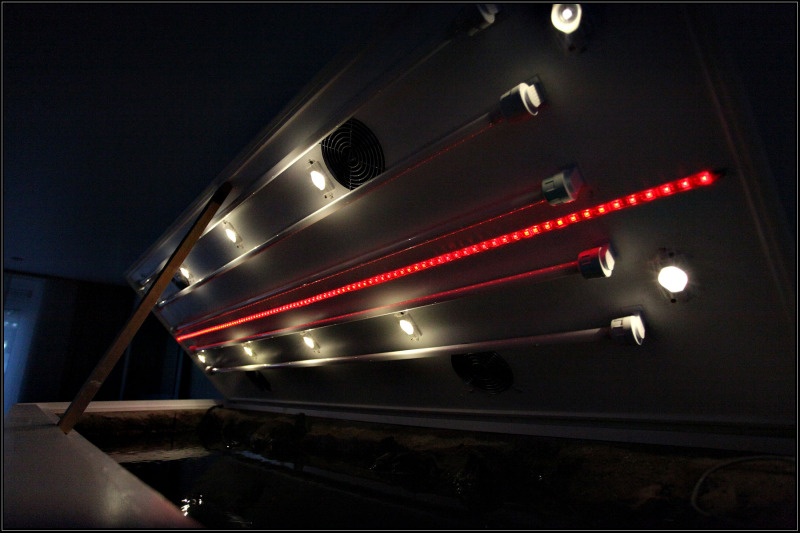
Adding the LEDs to the canopy:
Next post will be about the stainless steel tubes which i have used to connect the dosing unit, and the first pics of the second scape (sorry, no pics of the first one)
Specs are:
- 180x70x70 plywood tank with glass front
- No stabilizers (e.g. i have full movement over the tank)
- Pump connections all through the bottom of the tank
- 2x Eheim 2078 filtration
- Up Aqua Atomizer for CO2
- Profilux 3 controlled
- Profilux 3 dosing computer
- 5x 80w maxium light, dimmable by the Profilux 3 (DALI protocol)
- LEDs for the Profilux 3 (thunderstorms)
- Auto top off
- Auto water change with RO water (5% every night)
Here are the pics of the build.
Design:
The blue parts on the canopy are ventilation shafts. As you can see inside the canopy i have placed my ballasts and made such a channeling that the outside/room air flows from the center back over the ballasts inside my hood (warm air) and at the sides the moist air is going out.

Construction:
I was constructing this tank for over 2 years. It was a hobby project so a lot of time and money went into it. It all starts with supplies
Reinforcements:
First, i painted the plywood with an epoxy resin to make it water proof. Next i wanted absolutely NO stabilizers in the tank. Therefore i had to reinforce the front since the top bar has to little 'wood' to support the front window. So i ordered a steel beam and got crazy with the drill.

Background, attempt 1:
Next up was the background. First i applied several layers of fiber glass matt to enforce the casing. In total there are about 3 layers of fiberglass. I wanted to incorporate wood into my background, although i am aware of the risks (rotting and the fact that it becomes a part of the layout)

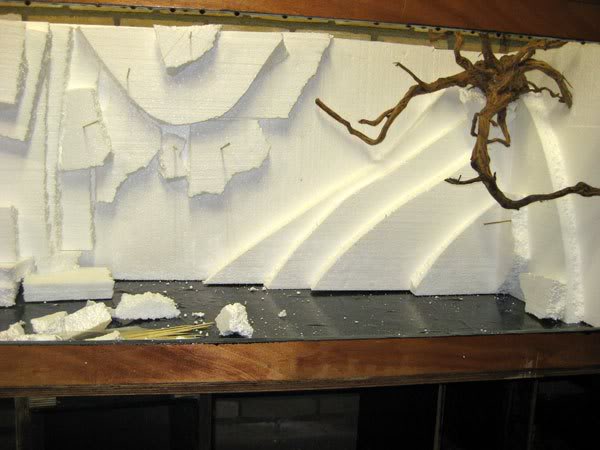
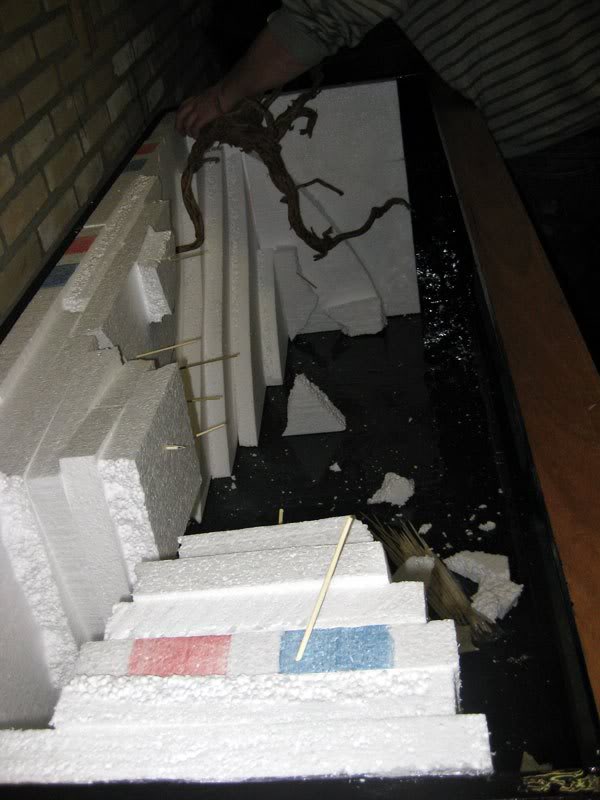
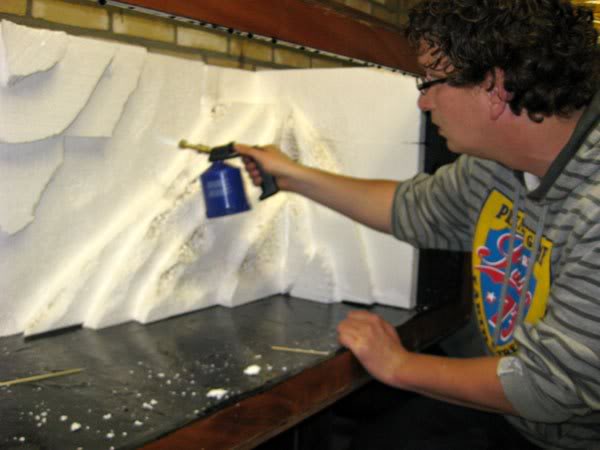


Background, attempt 2:
I was not happy with the above background. The friend which helped me had some good insights, but i wanted to have a planted tank. To much background equals less space for plants. So i decided to redo it. This is the result. If you look closely, you can see the return pipes (in both sides at the front of the glass) and my emergency overflow, the green cascet). Pump intakes are behind in the tank.
Background, finalizing:
Next up is to finish the background. First step involves adding concrete to the background. Why concrete? Since this makes it possible to smooth out holes and make a more rock-like structure. After the (Portland) cement i started adding "Elastopur" basically this is rubber like, 2-component glue-ish stuff which hardens in about 45 minutes, so you have to work fast. The color is yellow-ish but you can add pigment to make it more your own taste. I added brown and immediately after putting on the elastopur i added sand to make it even more naturally. It then looks like this....
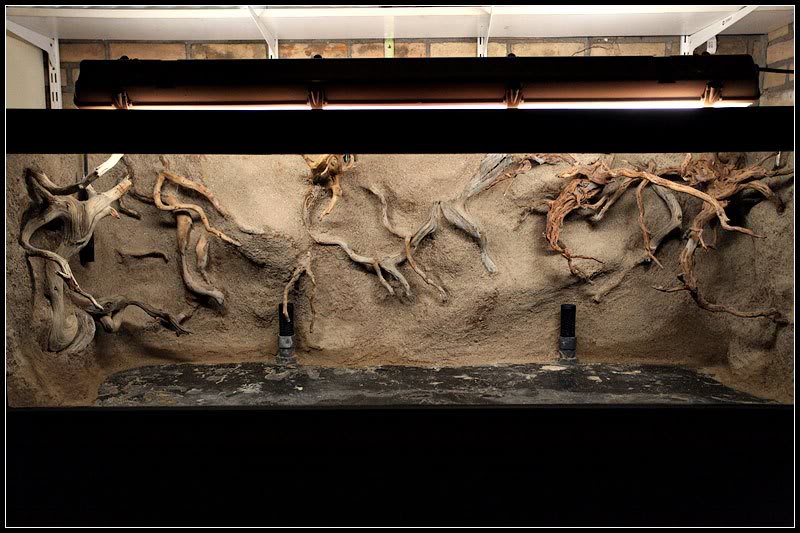

Next up, canopy:
So i've used some lamp holders from ebay and arraged my lights according to the design which is at the top of this post. Not a lot of pictures, but here goes.


Moving the tank:
After one month of test running in the garage where i built the tank (my wife is not that happy with 750 liters of water in the living room), i decided to move the tank indoors. I already had the holes for AWC so that helped a lot. In the pictures you also see my trafo, giving 12v. It is behind my tank so that means i can't access it anymore but as long as it works i am happy. It powers my Profilux and connected appliances so i don't have to use that much power adapters. The first picture shows the reinforcements i made at the back of the tank to make sure it doesn't bend.
Plumbing the AWC:
Not much plumbing to do, i had everything pretty much figured out and since i had to fill the tank with water anyway, most of the parts where already in place. However, i still had to do my AWC system which is illustrated in the next pictures.
The 'beast' consists of the following parts:
- The left pipe is the pipe which is directly connected to the tank. This means i can use the valve to quickly drain my tank or to get some water to water my plants
- The second pipe from the left is attached to a water solenoid. Currently i am using a different solenoid since the one in the picture required back pressure before it opened. Picture is to follow.
- Third pipe from the left (the long straight one) is directly connected to my emergency overflow and goes to my sewer. Basically the drain pipe.
- Forth pipe from the left (e.g. the right one) is connected to the blue waste water line of my R/O unit.
The last picture shows the different solenoids i have used. The left one is now in place and works like a charm, draining 5% (40 liters) in about 2 minutes. I could have increased this, but that meant i had to use a bigger pipe (20mm) instead of 16mm which is now in place.
Finalizing the build:

Adding the LEDs to the canopy:


Next post will be about the stainless steel tubes which i have used to connect the dosing unit, and the first pics of the second scape (sorry, no pics of the first one)